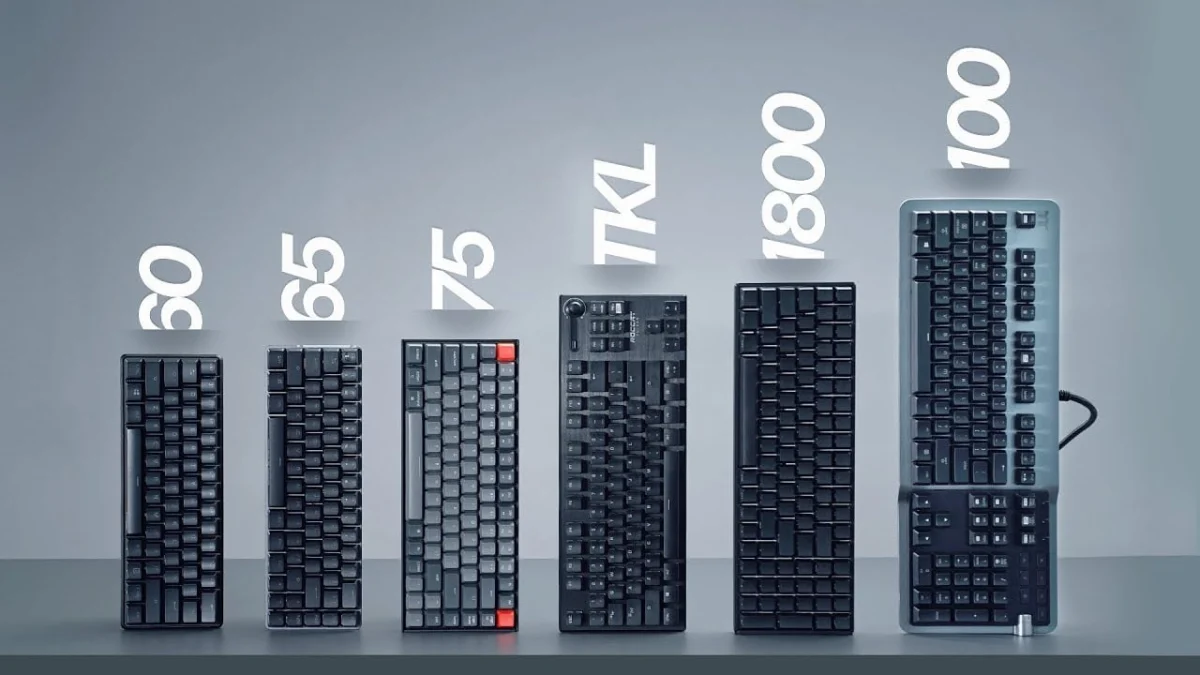









Mechanical keyboards have surged in popularity over the last decade, transitioning from niche enthusiast accessories to essential hardware for remote workers, competitive gamers, and daily computer users. Unlike membrane keyboards, mechanical variants are built for longevity, often boasting switch lifespans of 50 to 100 million keystrokes. However, this durability comes with a distinct maintenance challenge: the physical architecture of mechanical boards naturally collects dust, skin cells, hair, and sticky residue over years of heavy usage.
Industry data indicates that the average desktop keyboard can harbor significantly more bacteria per square inch than a standard household toilet seat if left uncleaned for extended periods. When debris accumulates beneath the keycaps and around the mechanical switches, it can alter the tactile feel, introduce unwanted friction, create inconsistent sound profiles, and eventually cause switch failure. Maintaining these peripherals is no longer merely a matter of aesthetics; it is a vital practice for preserving hardware investments that often cost upwards of one hundred to several hundred dollars.
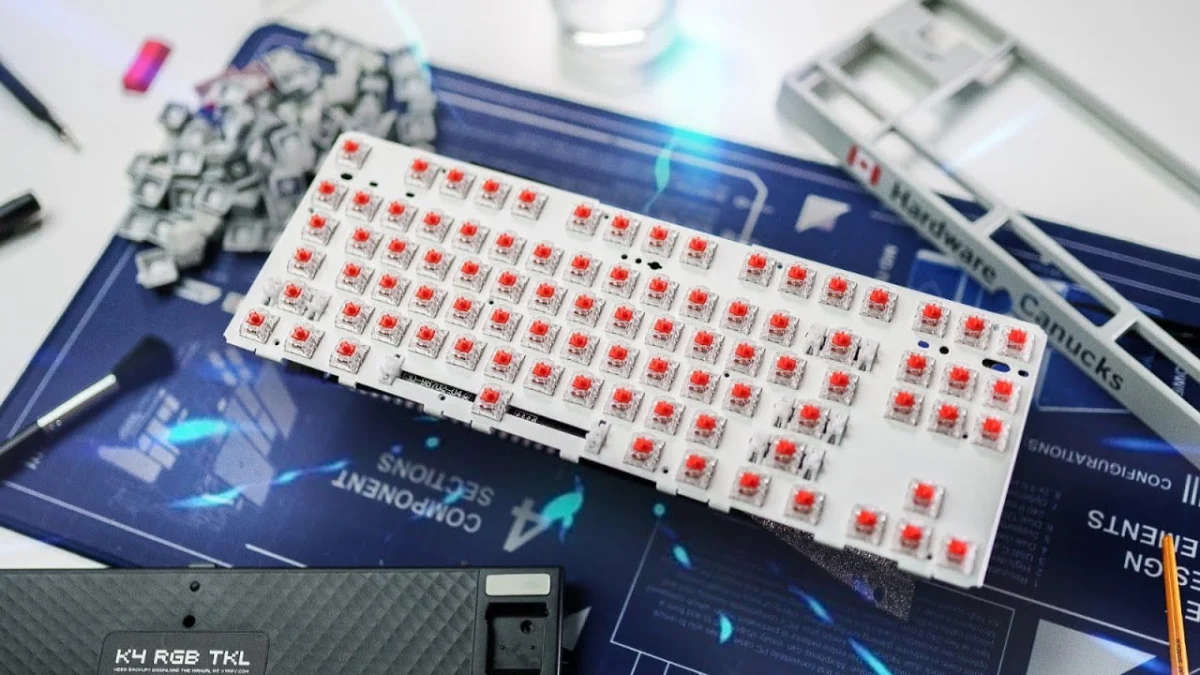
This comprehensive report examines the step-by-step restoration process of a heavily used gaming keyboard—specifically the XTRFY K40 TKL RGB Hardware Canucks Edition, which has seen continuous operation since its market debut in 2019. By analyzing the structural breakdown, chemical applications, and preventative maintenance strategies, users can safely execute a professional-grade deep clean without damaging sensitive internal electronics.
Anatomy of Contamination: Assessing the Hardware Candidate
The subject of this restoration, the XTRFY K40 TKL RGB, represents a traditional mechanical keyboard design featuring a white base plate and non-floating keycaps. Unlike modern floating-key designs where switches sit exposed above an open frame, traditional embedded-plate layouts feature recessed switches surrounded by a housing shell. This design choice provides a sleek aesthetic and dampens acoustic resonance, but it creates deep crevices where particulate matter and viscous oils become trapped over time.
Following two years of continuous deployment, a visual inspection revealed no major liquid spills, yet the microscopic reality proved far more complex. Fine particulate matter, including ambient dust and pet or human hair, had migrated deep into the chassis. More concerning was the viscous gunk—a combination of natural finger oils, dead skin cells, and airborne grease—that had heavily concentrated around high-traffic operational zones.
Data compiled from peripheral ergonomics studies shows that specific keys experience exponentially higher contact rates. On a standard QWERTY layout, the spacebar, left Shift, left Control, and the Enter key accumulate grime at nearly triple the rate of standard alphanumeric keys. In this specific case, factory-lubricated stabilizers beneath the larger keys had trapped stray hairs within the dielectric grease, creating sticky clusters that threatened to impede smooth key travel and acoustic dampening.
Chronology of Restoration: The Disassembly Phase
A methodical approach is essential when undertaking a mechanical keyboard deep clean to prevent irreversible damage to the printed circuit board (PCB) or the delicate stems of mechanical switches. The restoration timeline follows a strict protocol: preliminary debris extraction, frame disassembly, keycap extraction, chemical cleaning, and mechanical scrubbing.
The first operational phase involves inverting the peripheral and applying gentle mechanical agitation, such as tapping the chassis. This dislodges loose particulate matter trapped between the switch housing and the plate before moisture is introduced, preventing the formation of wet sludge.
Following preliminary dry shaking, the next phase addresses structural disassembly. Many modern tenkeyless (TKL) mechanical keyboards incorporate a modular top plate secured by accessible exterior fasteners. For the XTRFY K40, removing these chassis screws allows the top frame to lift away entirely. According to hardware repair analysts, this modularity is a critical design advantage; separating the upper housing exposes the perimeter edges of the board, granting unrestricted access to stubborn residue accumulated along the absolute boundaries of the frame.
Prior to removing the keycaps, hardware technicians strongly recommend documenting the layout. While standard QWERTY configurations are universally understood, specialized bottom rows, macro clusters, and unique profile steps can lead to reassembly errors. Referencing a digital schematic on an external monitor serves as an infallible reference map during the final reconstruction stage.
Extraction and Chemical Bath Protocols
With the structural frame disassembled and the layout mapped, the keycap extraction phase begins. Utilizing a wire or ring-style keycap puller ensures an even, vertical upward force, preventing damage to the cross-shaped stems on standard MX-style switches. Special care is required for stabilized keys—such as the spacebar and Shift keys—where metal wire inserts must be gently maneuvered to avoid snapping the delicate plastic housing clips.
Once extracted, the keycaps undergo an immersion cleaning protocol. Submerging ABS or PBT keycaps in a lukewarm bath of mild dish soap and water for approximately 60 minutes effectively breaks down stubborn surface grease and stem contamination. Industry standards advise against using harsh chemical solvents during this stage, as strong alkaline cleaners or excessive heat can warp plastic polymers or degrade printed legends.
While the keycaps soak, attention shifts to the exposed keyboard chassis and switch plate. Manufacturers and hardware restoration specialists emphasize that liquid management is the single most critical factor during this phase. Excessive moisture ingress can compromise the underlying PCB, leading to short circuits or permanent electronic failure.
Instead of flooding the chassis, technicians employ a controlled damp-cleaning technique. A solution of isopropyl alcohol (IPA) and distilled water—typically mixed at a 50/50 ratio—is applied sparingly using cotton swabs and firm-bristled brushes. Isopropyl alcohol acts as a solvent capable of dissolving sticky lipid deposits without leaving conductive residues, provided the alcohol concentration evaporates fully before power is restored.
Mechanical Scrubbing and Stabilizer Maintenance
The physical removal of sticky grime around the switch housing requires meticulous manual labor. Data from electronic maintenance logs indicates that organic residue bonded to white plastic base plates undergoes a curing process over prolonged exposure to atmospheric oxygen and heat from internal LEDs, turning a soft film into a hardened, cement-like glaze.
During the restoration of the XTRFY K40, technicians noted that traditional soft paintbrushes proved inadequate for high-viscosity buildup, often absorbing the sticky material and degrading the brush fibers. Harder-bristled synthetic tools paired with alcohol-dampened cotton swabs yielded optimal results, allowing technicians to physically abrade the grime surrounding the WASD cluster, spacebar perimeter, and left Shift stabilizers without flooding the switch mechanisms.
A critical technical consideration during switch-plate cleaning involves factory-applied lubricants. Mechanical stabilizers are deliberately greased at the factory to eliminate metallic rattling and ensure smooth vertical actuation. Aggressive cleaning in these zones can inadvertently strip away this vital lubrication. Maintenance guidelines dictate that technicians must carefully clean around the stabilizer housing while preserving the internal grease film, or alternatively, be prepared to manually re-lubricate the stabilizers using high-viscosity dielectric grease or Krytox 205g0 upon reassembly.
Drying, Post-Processing, and Reassembly
Following the chemical cleaning and scrubbing phases, component management shifts to drying and quality assurance. Keycaps removed from their soapy bath retain significant internal moisture within their cylindrical stems. Standard protocol mandates that each keycap be manually shaken, patted dry with lint-free microfiber towels, and placed face-up to allow complete evaporation of residual trapped water. Rinsing the keycaps in clean water prior to the drying phase is essential to eliminate soap film residue that could attract future dust accumulation.
Before the top frame and keycaps are reinstalled, a final dry sweep of the white base plate is conducted using clean, non-shedding synthetic brushes. Brushing must be executed unidirectionally—sweeping debris outward off the board rather than driving particles deeper into the switch apertures.
Reassembly proceeds in reverse chronological order. Technicians begin with the structural top frame, reconnecting internal cabling and ensuring dampening foam inserts are properly seated within the base to preserve the acoustic profile of the keyboard. Keycaps are systematically replaced using the digital monitor reference, starting with larger stabilized keys to ensure proper wire alignment before filling out the standard alphanumeric grid.
As a final finishing step, the reassembled peripheral undergoes a surface polish using a dry microfiber cloth to remove any skin oils transferred during handling.
Broader Industry Implications and Preventative Maintenance
The successful restoration of a heavily utilized mechanical keyboard highlights a broader conversation within the consumer electronics sector regarding the "Right to Repair" and product longevity. As environmental awareness grows and electronic waste metrics reach unprecedented global highs, consumer habits are shifting away from disposable peripherals toward long-term hardware investments.
Tech industry analysts note a distinct rise in consumer demand for modular, easily serviceable hardware designs. Brands that incorporate accessible top plates, hot-swappable switch sockets, and modular cables command higher consumer loyalty because users can independently perform routine maintenance, significantly extending the operational lifespan of their devices.
Furthermore, ergonomic and occupational health studies underscore the importance of peripheral hygiene. Office environments and gaming setups are frequent vectors for microbial transfer. Establishing a quarterly or semi-annual maintenance schedule—involving surface dusting, keycap washing, and chassis sanitization—not only protects the structural and electronic integrity of expensive hardware but also mitigates potential health risks associated with bacterial accumulation on high-touch daily tools.
Ultimately, maintaining a mechanical keyboard requires patience, precision, and adherence to chemical safety protocols. By treating peripheral maintenance as an essential technical procedure rather than a superficial chore, users can preserve the factory-fresh tactile feedback, acoustic resonance, and aesthetic appeal of their hardware for years to come.