
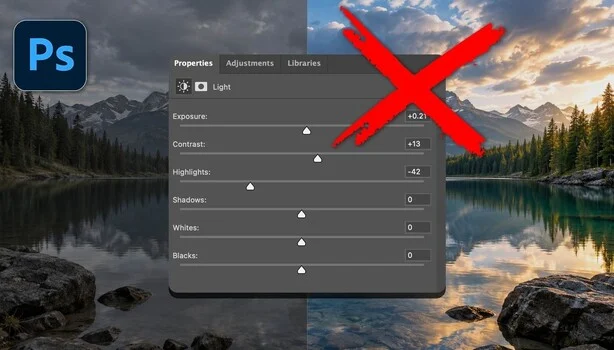
The Adobe Photoshop ecosystem has long maintained a distinct architectural division between its raw image processing environments—such as Adobe Camera Raw (ACR) and Lightroom—and its raster-based layer compositing interface. However, a recent, under-the-radar software update has blurred these historical boundaries. Adobe has quietly integrated a native "Light" adjustment layer directly into the primary Photoshop user interface. This new feature offers exposure, tone, contrast, and color controls that are nearly identical in appearance and nomenclature to those found in the company’s dedicated raw processors.
This design convergence has triggered widespread confusion among photographers, retouchers, and digital artists regarding the optimal software pipeline for professional image processing. Because the new Photoshop Light layer mimics the controls of dedicated raw engines, users are increasingly uncertain about whether they should perform fundamental tonal adjustments inside the raw environment or within the layer-based Photoshop interface.
The scope of this user confusion prompted prominent photography educator Matt Kloskowski to produce an in-depth technical analysis addressing the software overlap. Through a series of rigorous side-by-side comparisons, Kloskowski evaluated how the new Photoshop Light adjustment layer handles extreme exposure modifications compared to traditional raw processors. His findings reveal significant divergence in how the two systems process digital data, particularly when recovering highlights or pushing deep shadow details.
Technical Analysis: Raw Processors Versus Raster Adjustment Layers
To understand the core issue identified in Kloskowski’s demonstration, one must examine how Photoshop and raw processors handle underlying image data. When an image is opened as a raw file in ACR or Lightroom, the software has direct access to the uncompressed, un-mosaiced sensor data containing the maximum possible dynamic range. Adjustments made in these environments calculate tonal changes against the raw sensor data before final demosaicing occurs.
Conversely, an adjustment layer operating within the standard Photoshop interface processes flattened raster pixels, often working within a standard working color space such as sRGB or Adobe RGB (1998). When users push these controls to extremes, the computational limitations of raster manipulation become readily apparent.
During his comparative testing, Kloskowski targeted a bright cloud bank, applying aggressive highlight recovery in both the native Photoshop Light layer and Lightroom. Upon zooming in to inspect pixel-level structure, the limitations of the Photoshop layer became evident: the highlights exhibited muddy degradation, and fine tonal gradations smeared into flat, featureless gray. In contrast, the dedicated raw editor successfully preserved subtle color channels and structural fidelity within the clouds.
A similar divergence occurred during shadow-recovery tests. When cranking shadow sliders to extreme, non-standard levels, the Photoshop Light layer produced blocky, highly pixelated black voids where fine edge detail was permanently lost. While Lightroom introduced digital noise when subjected to the same aggressive shadow lifting, the underlying structure—such as individual branches of a distant tree—remained distinctly legible.
Based on these technical discrepancies, Kloskowski established a clear operational rule for digital imaging workflows: fundamental operations concerning tone, light, contrast, and color should be executed at the raw stage, whether those edits are applied globally or via local masking tools. Furthermore, modern raw editors feature sophisticated AI-driven masking and automated selection tools that often surpass the speed and precision of traditional Photoshop layer masks, providing fewer technical incentives to migrate raw files prematurely into the main workspace.
File Bloat and Storage Implications
Beyond image fidelity and data integrity, the integration of native adjustment layers introduces substantial practical considerations regarding file storage and project management. Professional photographers and studios manage vast archives of high-resolution imagery, making file size efficiency an economic priority.
When a standard raw file—typically ranging from 30 MB to 50 MB depending on camera sensor specifications—is processed and saved within Photoshop with the inclusion of native adjustment layers and history states, the resulting document footprint expands dramatically. Kloskowski noted that saving a Photoshop project file containing a single Light adjustment layer can cause the file size to balloon to nearly 400 MB.
For commercial studios handling thousands of assets per project, this exponential increase in file weight translates directly into escalated storage infrastructure costs, slower local auto-saves, extended network transfer times, and increased demands on cloud backup solutions. While enterprise storage costs have declined steadily over the decades, managing multi-gigabyte layered files for minor tonal tweaks introduces operational overhead that workflow-conscious professionals prefer to avoid.
Historical Context and Target Audience Architecture
To properly contextualize the introduction of the Light adjustment layer, industry analysts point to the diverse demographic makeup of Adobe’s user base. Photoshop was never engineered exclusively for photographers processing raw camera captures. Since its commercial inception, the software has served as a universal canvas for graphic designers, web developers, UI/UX professionals, digital illustrators, and layout artists.
A vast percentage of these creative professionals never open Adobe Camera Raw or Lightroom. Their daily workflows involve assembling multi-layered ad compositions, digital collages, web graphics, and mixed-media design assets where no underlying raw camera file exists. For these users, applying tonal corrections via traditional adjustment layers like Curves or Levels required navigating older, less intuitive dialog boxes.
By introducing a streamlined Light adjustment layer with familiar sliders, Adobe aimed to provide non-photographic designers with a modern, intuitive tool for harmonizing color and exposure across disparate graphic elements within a composite. Viewed through this structural lens, the Light adjustment layer is not intended to serve as a direct competitor to Lightroom or ACR, but rather as a specialized utility engineered for raster-based compositing tasks.
Kloskowski’s analysis acknowledges this specific utility, noting that the tool performs adequately on images with limited dynamic range. On a photograph or composite element requiring only minor, subtle contrast or exposure nudges, the final visual output may show no perceptible difference between a raw edit and a Photoshop adjustment layer.
Moreover, the Light layer unlocks specific compositing capabilities that are difficult or impossible to achieve within a traditional raw processor. For example, designers frequently clip a Light adjustment layer directly to a specific smart object or raster layer within a complex composite. This allows them to precisely match the luminance and brightness of a subject to an unrelated background plate in real time—a localized workflow maneuver that cannot be executed natively within a raw processing engine.
Industry Implications and Workflow Best Practices
The quiet rollout of the Light adjustment layer highlights a broader trend in software development: the convergence of professional toolsets to accommodate users of varying skill levels. However, this convergence often blurs the boundaries of best practices, leading to workflow inefficiencies among users who mistake software convenience for technical optimization.
For professional photographers and high-end retouchers, the industry consensus remains firmly anchored in upstream processing. Establishing a rigorous workflow discipline involves utilizing Lightroom or Camera Raw as the definitive environment for all structural, tonal, and optical corrections—including sharpening, noise reduction, chromatic aberration removal, and lens profile adjustments.
Once the foundational image data is optimized and balanced at the raw level, files can be passed into Photoshop for advanced retouching, frequency separation, compositing, and creative grading. The Light adjustment layer should thus be reserved for specific creative scenarios, such as localized blending within complex composites or rapid adjustments on non-raw graphic assets.
As Adobe continues to refine its ecosystem through artificial intelligence integration and cross-platform synchronization, maintaining a clear understanding of underlying software architecture remains essential for creative professionals. Recognizing the specific design intent behind tools like the Photoshop Light adjustment layer ensures that digital artists can harness software innovations without compromising image fidelity, data integrity, or storage efficiency.