

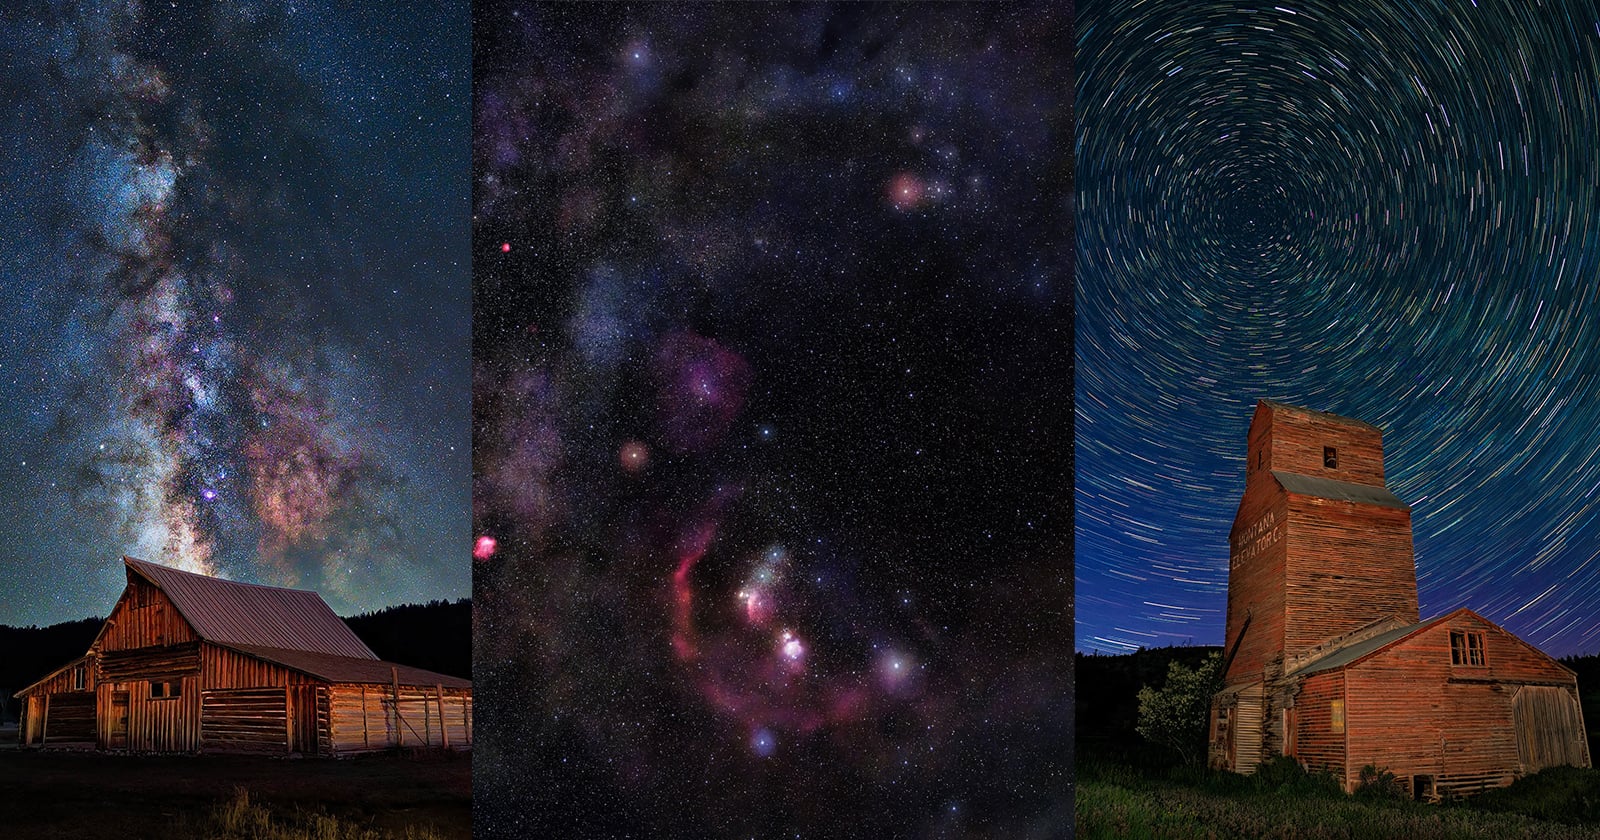
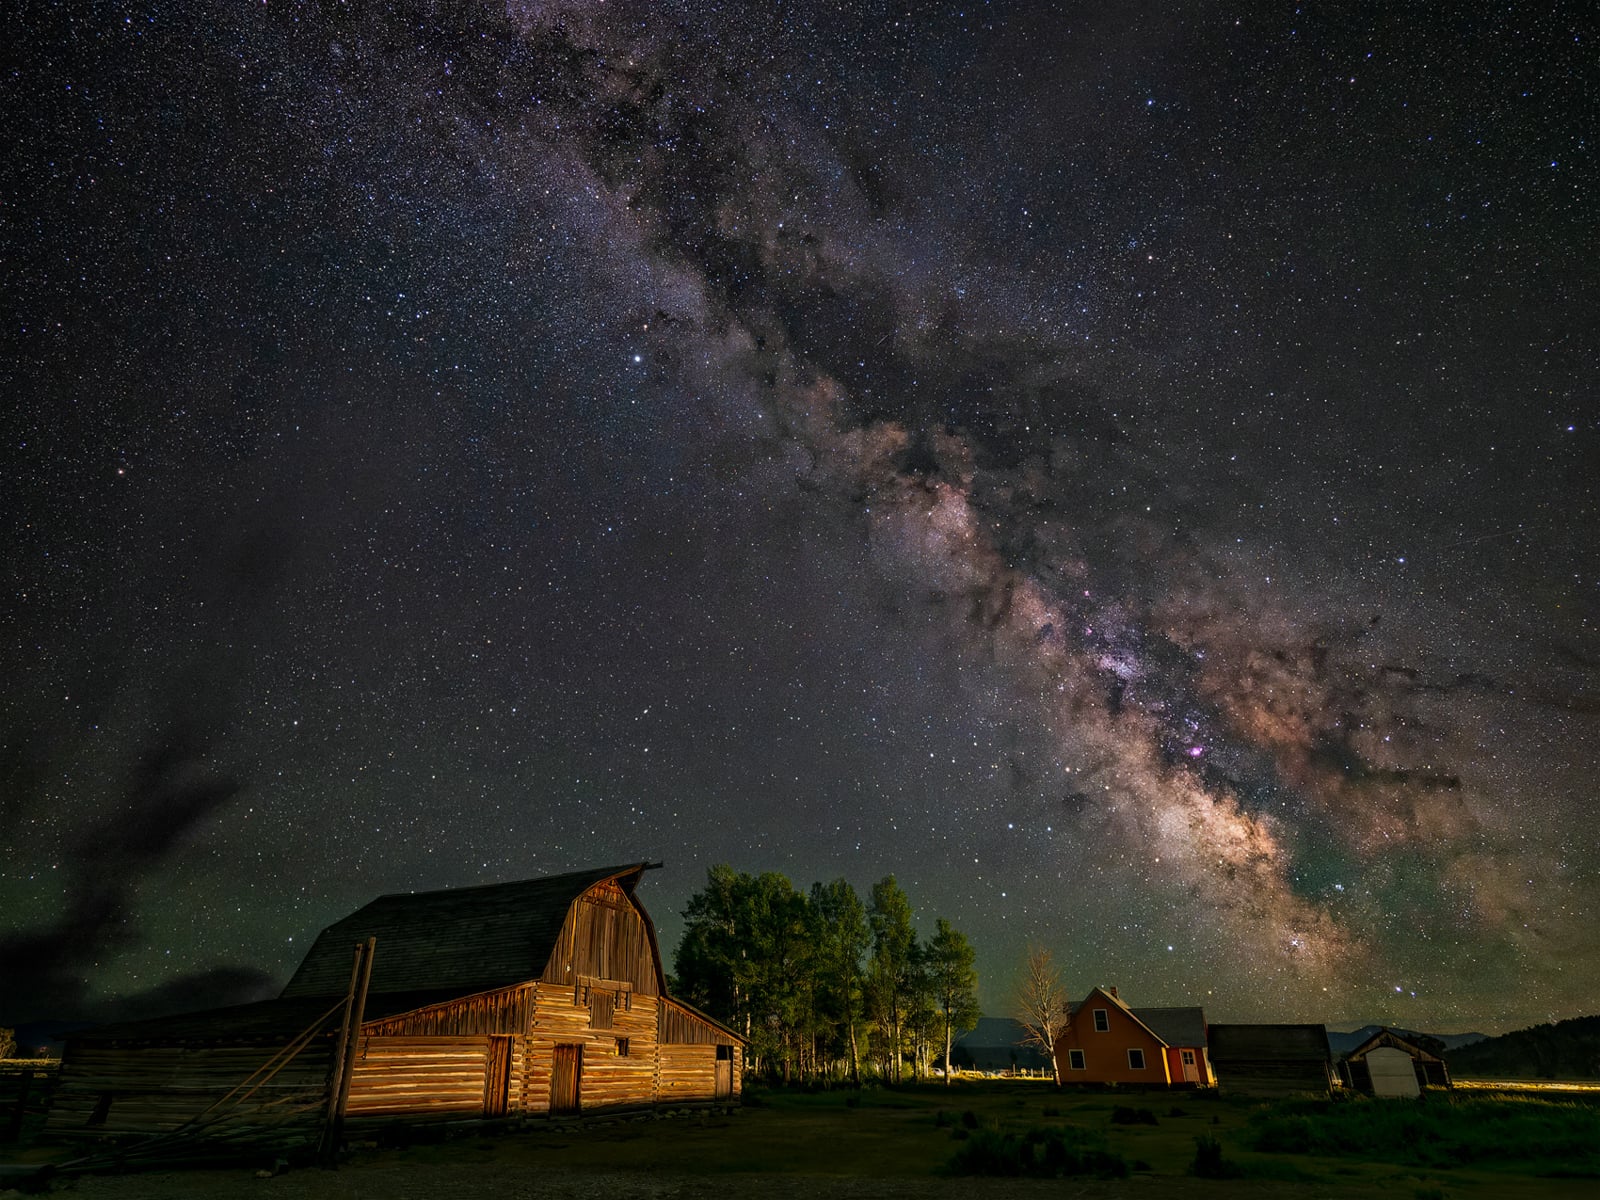
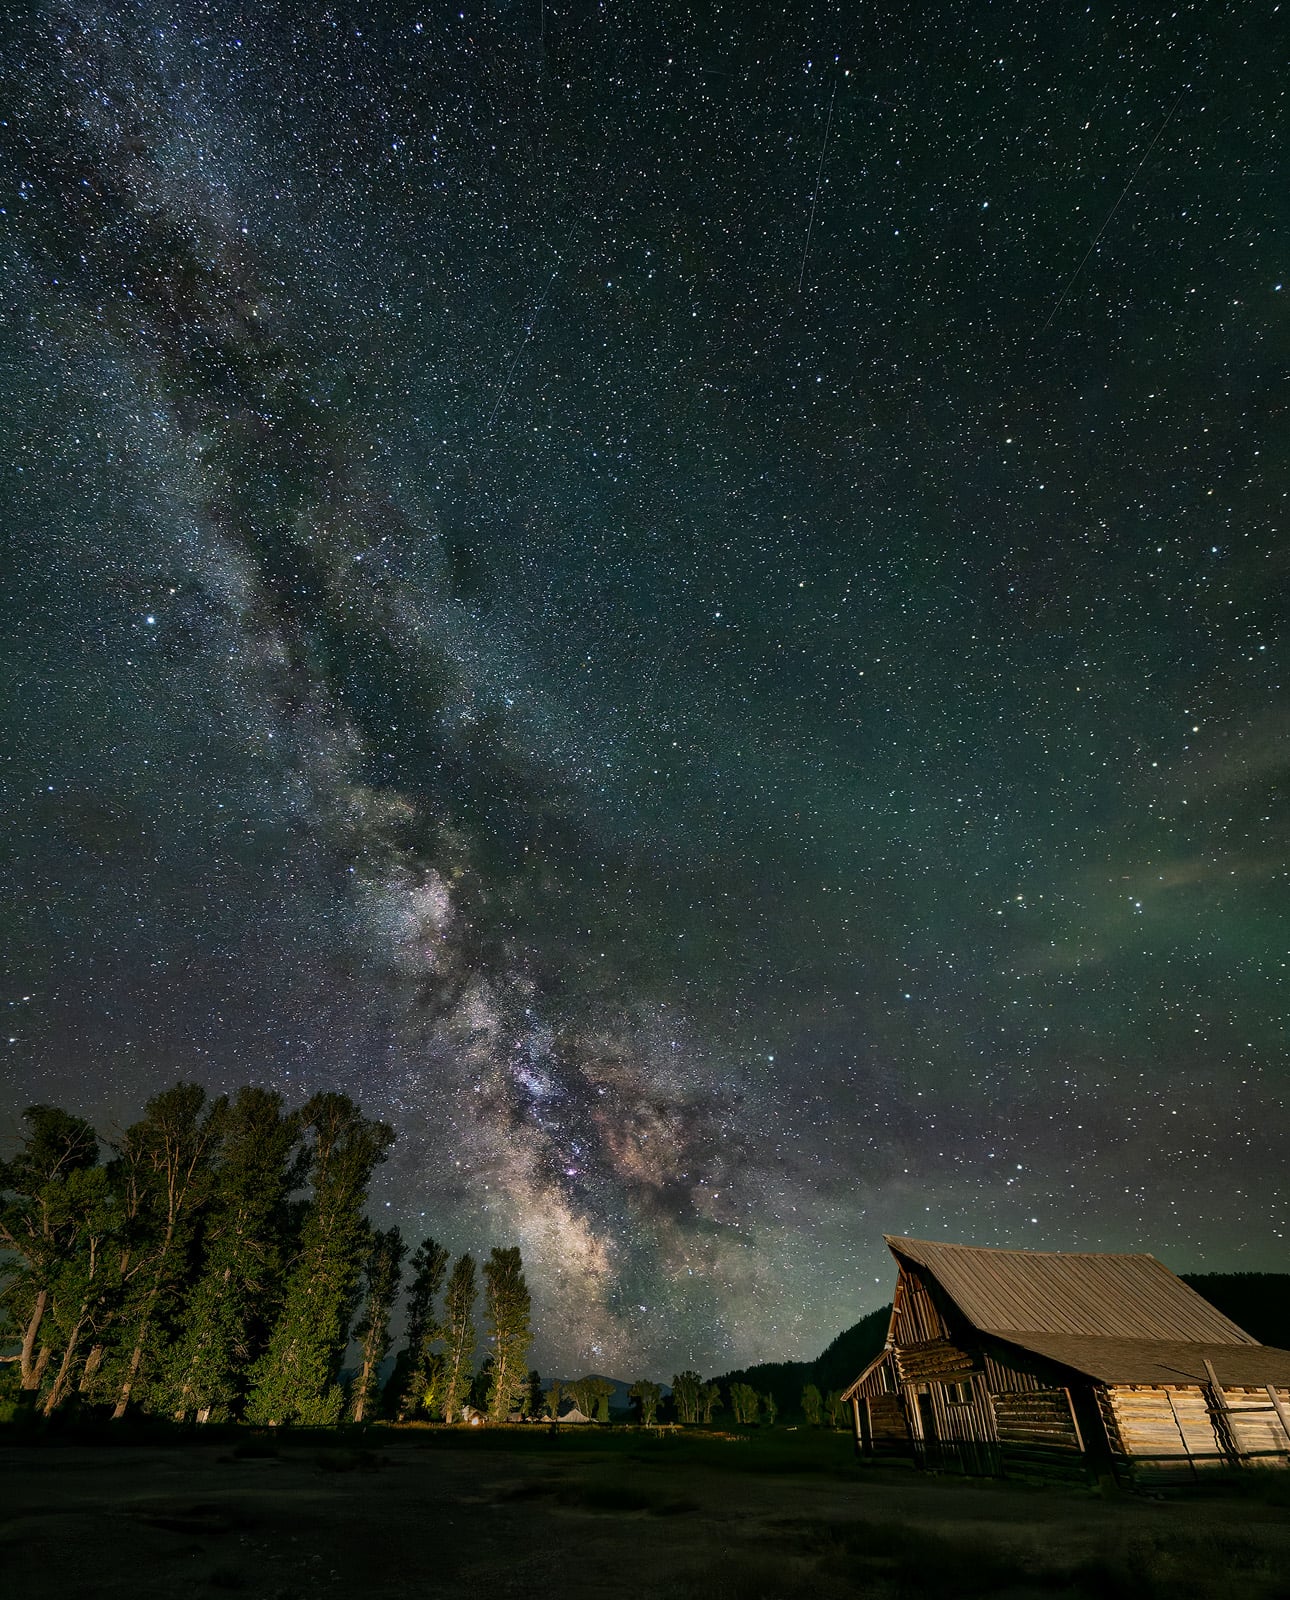
Photographer Matt Suess was deep in the heart of Joshua Tree National Park, approximately 45 minutes into a long-exposure star trail capture, when a celestial phenomenon arrested his attention. A faint, hazy band stretched across the inky canvas above. Having grown up in the light-polluted skies of New England, where the Milky Way remained a distant, unseen marvel, Suess was initially unaware of the spectacle unfolding before him. His instinct, honed by years behind the lens, prompted him to point his camera towards it. This marked his first encounter with the Milky Way, a moment that, while visually profound, resulted in images lacking the sharpness he desired—a lesson in the nuanced demands of astrophotography that only decades of dedicated practice could fully impart.
This article was brought to you by OM SYSTEM.
From Childhood Fascination to Professional Educator
Matt Suess, an OM SYSTEM Ambassador, has dedicated a significant portion of his life to capturing the ethereal beauty of landscapes and the night sky. His journey began at the tender age of 12 when he constructed his first darkroom, a testament to an early and enduring passion. As a teenager in Connecticut, he was already experimenting with star trail photography on color slide film. His profound fascination with the cosmos even led him to briefly pursue mechanical engineering, fueled by a dream of designing rockets for NASA. While the career in aerospace did not materialize, his profound connection to the night sky remained unbroken.
Today, Suess leverages his extensive expertise to lead immersive night sky photography workshops. These expeditions span from the majestic Grand Tetons to the arctic landscapes of Norway, guiding aspiring photographers through the unique challenges of capturing images in environments many have never experienced. He emphasizes that the most valuable lessons he imparts are not found in manuals or gear reviews, but are forged through hundreds of nights spent in the field, troubleshooting and refining his techniques.
"I remember the feeling when I first saw the Milky Way in Joshua Tree," Suess shares with PetaPixel. "I was in disbelief. I just stood there, mesmerized. Many participants in my workshops experience that same awe when they witness a truly dark night sky for the first time. To see their eyes light up and then help them translate that vision into photographs—that’s a reward that never diminishes."
The Art of Asking the Right Questions in Astrophotography
A common pitfall for semi-experienced astrophotographers is getting stuck by asking the wrong questions. The urge to upgrade equipment, often stemming from the query, "Do I need a better camera?" is frequently misplaced. Suess contends that the fundamental question should instead be: "What is actually limiting my shots?"
"If your stars aren’t sharp, the issue could be your focus technique, instability from a lightweight tripod in windy conditions, or a lens that’s too slow or soft for the environment," Suess advises his workshop students. "Many photographers upgrade their camera bodies when, in reality, they might benefit more from a faster prime lens or a more robust tripod."
Suess’s own approach to astrophotography, particularly for star trails, was profoundly influenced by a workshop participant. While reviewing a student’s work, Suess discovered an in-camera technique for creating star trails in real-time, a method that bypassed the years of manual stacking in post-processing he had employed. This revelation, stemming from the OM SYSTEM’s Live Composite feature, reshaped his perspective on the capabilities of modern camera technology.
"That moment fundamentally changed how I thought about astrophotography gear," he reflects. "Before recommending any new equipment, I always ask students if they’ve fully explored every feature and setting on their current camera. Have they experimented with different lenses for astrophotography? Most photographers, I’ve found, only utilize about 30% of the potential of the gear they already own."
Maximizing Your Current Kit: Understanding Its Full Potential
The key to superior astrophotography often lies not in acquiring more gear, but in deeply understanding the capabilities of what you already possess. Suess advocates for a thorough exploration of a camera’s existing functionalities before considering upgrades. This includes understanding which lenses are best suited for night sky work and which might be left behind in favor of more specialized optics.
"When you become serious about astrophotography, your kit might expand to include multiple tripods, a star tracker, and a selection of lenses," Suess notes. "Lighter camera bodies and lenses can make a significant difference. My personal setup includes the OM-1 Mark II and the OM-5 Mark II, along with fast prime lenses and a star tracker for deep-sky imaging. The heavier your equipment, the less you’re likely to carry, and the more you’ll regret leaving essential tools behind in the field. A lightweight yet effective setup will not only improve your images but also enhance your overall enjoyment of shooting under the night sky."
His most emphasized lessons in workshops often center on maximizing existing gear: "Before making any changes, identify how you can take better photos with the gear you have. For instance, one of the more common issues I observe on the first night of my workshops is images with short star trails because the shutter speed was set too long."
As a starting point, the "500 rule" is a widely recognized guideline: divide 500 by the 35mm equivalent focal length of your lens. Any shutter speed exceeding this value will likely result in visible star trails. However, Suess personally prefers a more empirical approach. "I prefer not to do math in the field," he admits. "I’d rather take a test shot, check for star sharpness, and adjust the exposure time accordingly."
With experience, photographers develop an intuitive understanding of the maximum exposure time their preferred astrophotography lenses can handle before star trails become too pronounced. For Suess, the M.Zuiko Digital ED 17mm F1.2 PRO lens is a frequent companion for Milky Way expeditions. "At its 34mm equivalent, it’s wide enough to frame the Milky Way’s arc with a compelling foreground, yet not so wide that stars distort at the edges," he explains. "The f/1.2 aperture allows me to reduce my ISO by at least one stop compared to an f/2 lens, which translates directly to cleaner stars and less noise in the RAW file. Fast glass is crucial for distinguishing a usable wide-field astro shot from a soft, noisy one. That lens stays on one of my cameras more than any other."
Mastering Focus: From Manual Precision to Automated Ease
Achieving precise focus on stars represents one of the most technically demanding aspects of astrophotography. Suess’s teaching method begins with a meticulous manual process. "You engage live view, magnify the image, and locate the brightest star in your frame," he instructs. "Slowly rotate the manual focusing ring back and forth. You’ll observe the star expand into a soft blur, resembling a golf ball, and then shrink to its smallest point. Continue making minute adjustments, honing in until the star appears as tiny as possible. Once achieved, secure the focusing ring with tape, hoping that focus remains consistent throughout the night."
This manual method, while effective, demands patience, a steady hand, and stable environmental conditions. Slight shifts in temperature, accidental bumps to the tripod, or even recomposing the shot can alter focus. For workshop participants capturing their first Milky Way images, even a minor focus drift can result in a night of soft, unsharp stars.
"As a professional, I’ve become accustomed to this process," Suess acknowledges. "With practice, I became faster. However, there were instances where the focus was slightly off, and my stars weren’t as sharp as they could have been. The margin between sharp and soft is incredibly fine."
The introduction of OM SYSTEM’s Starry Sky AF feature has revolutionized this aspect of astrophotography for Suess and his clients. This innovative technology automates the focusing sequence, allowing the camera to lock onto a star and confirm the optimal focus point with a single button press. "It almost feels like cheating," Suess remarks. "I watch the camera perform essentially the same manual focus technique I’ve been using for years. The stars enlarge and soften, then shrink, and the camera locks in. For me, and especially for my clients with cameras featuring Starry Sky AF, it eliminates the guesswork involved in focusing on stars, allowing them to concentrate on achieving the correct exposure and composition."
Preparing for the Unexpected: Beyond the Photography Guides
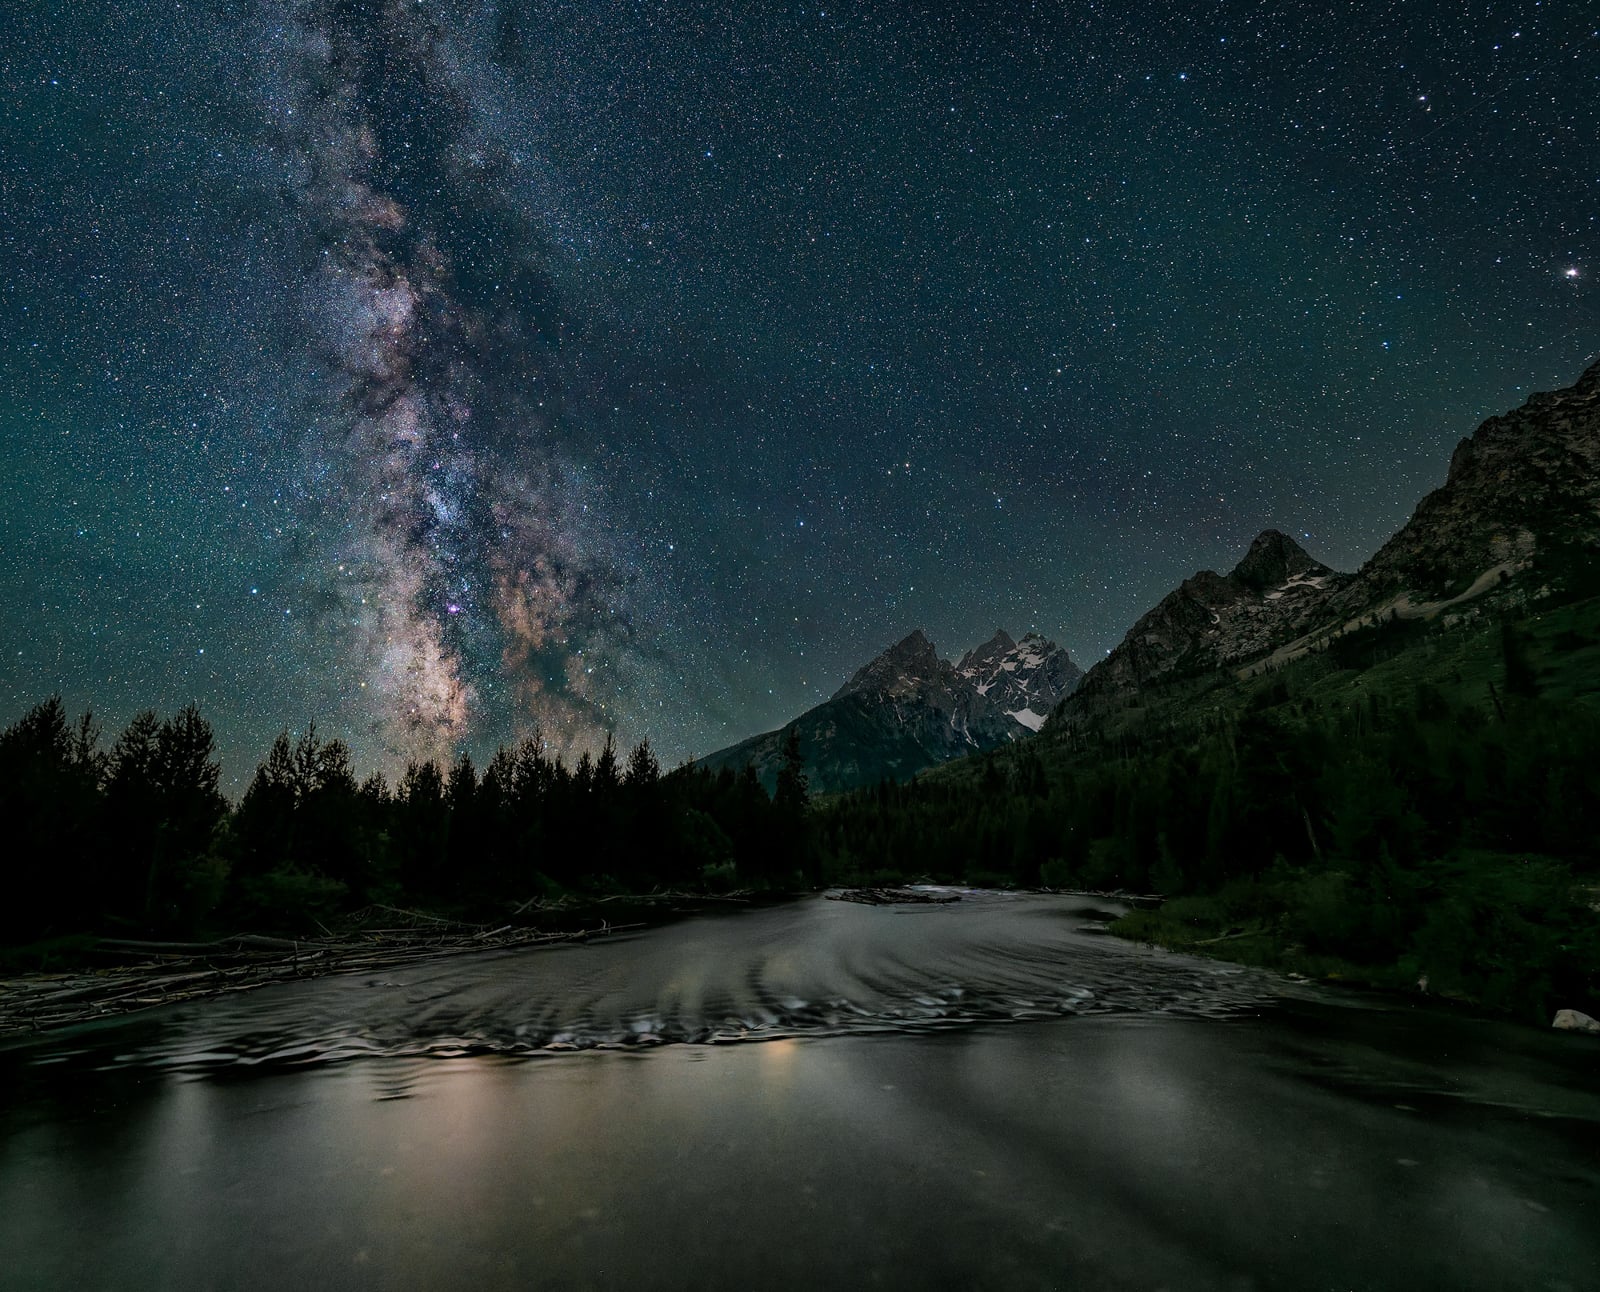
While most astrophotography workshops begin with technical settings, Suess prioritizes educating his students about the celestial environment itself. "The primary concern is always clouds," he states. "Unless there are significant breaks, clouds typically obscure the stars. I often shoot in the Tetons, where sudden storms are common. You might observe clear skies in one direction and heavy rain in another. Therefore, vigilant weather monitoring and the flexibility to relocate are paramount."
Suess relies on weather forecasting applications like Weather Mate for hourly predictions and Windy for satellite cloud cover analysis. "I always advise photographers to be prepared to adapt their plans," he recommends. "The window of opportunity for ideal dark skies is limited, so having a solid Plan B for an astro shot is far better than having no shot at all."
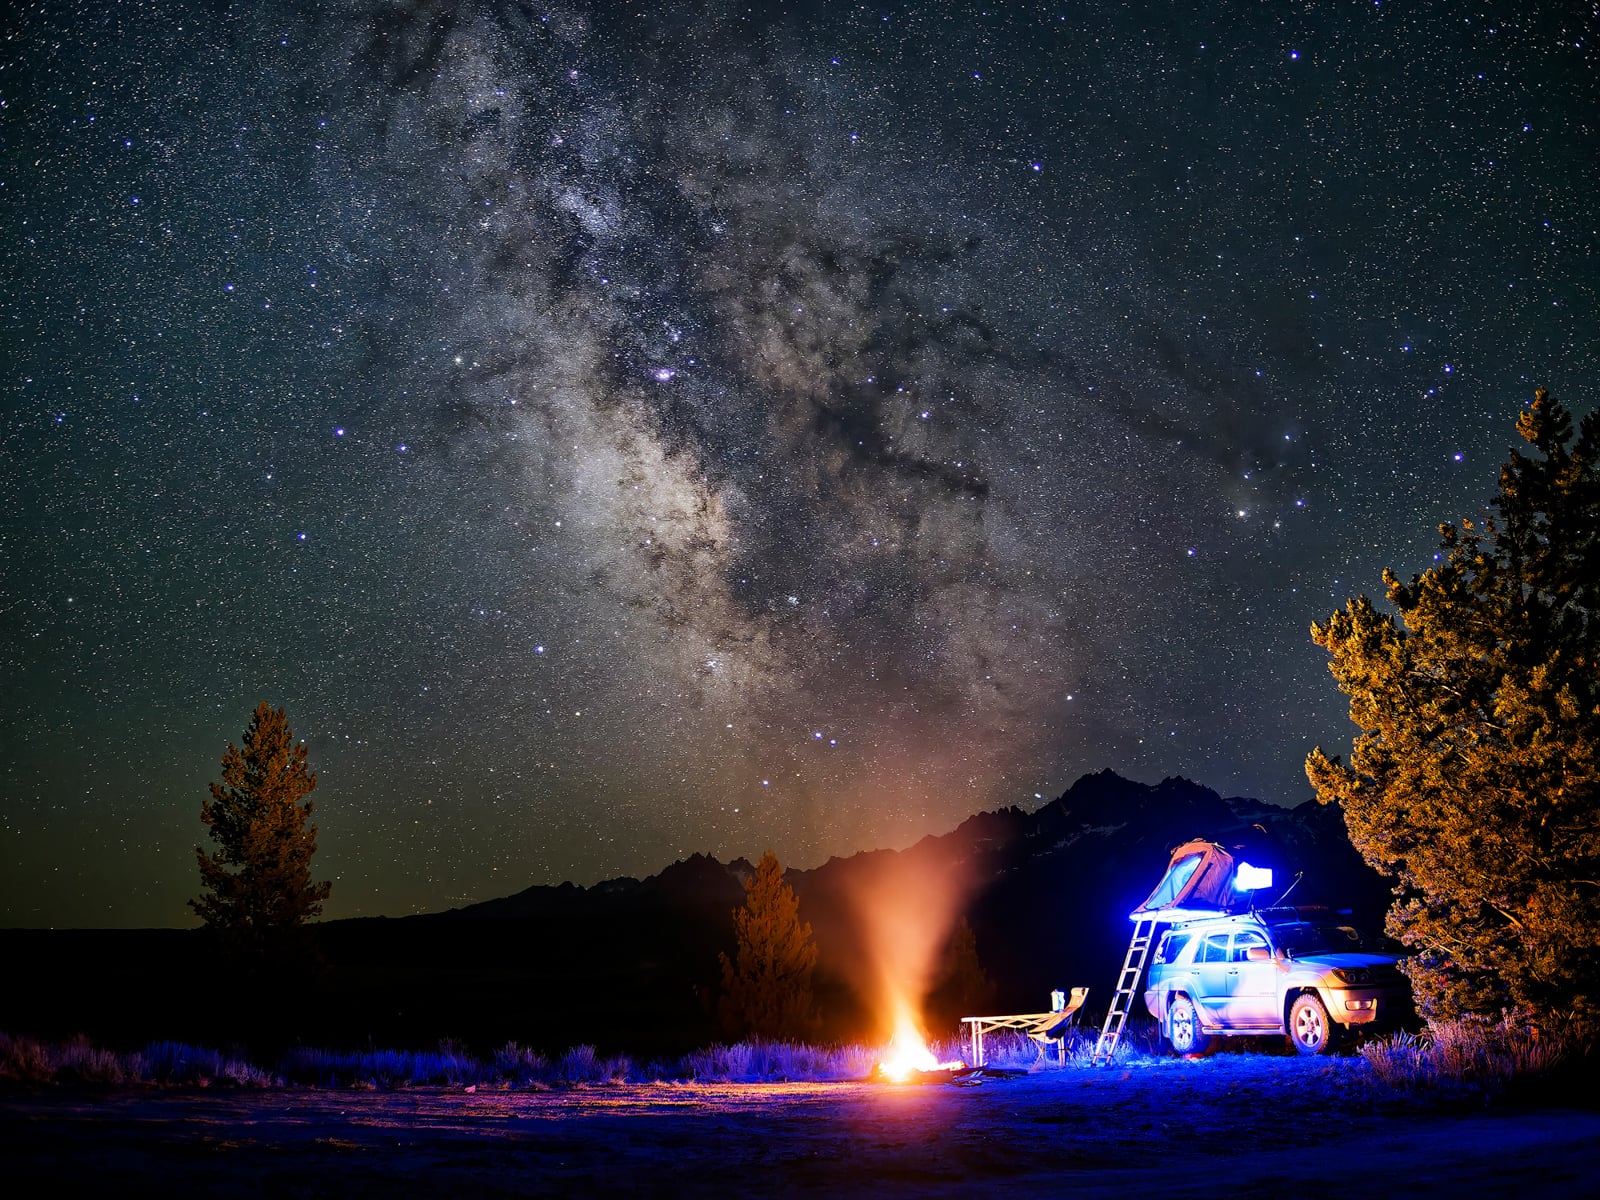
Another significant factor impacting astrophotography time is cold weather. "I’ve been on shoots where a temperature of 42 degrees Fahrenheit felt manageable on the drive out," Suess recalls. "However, after two hours of standing in one spot for a Live Composite star trail exposure, generating no body heat, I was shivering. It feels considerably colder when you’re stationary than the thermometer suggests. I’ve learned to dress two layers warmer than the forecast indicates."
Photography guides rarely address the potential for unexpected encounters in the dark. "Animals are always a consideration," Suess stresses. "I photograph in landscapes inhabited by bears, moose, and bison. In the desert, I carry a black light to check for scorpions. It’s crucial to research the local wildlife in any location you visit, as the conditions ideal for astrophotography—darkness and remoteness—are also prime habitats for potentially dangerous animals."
Many photographers dismiss nights with a visible moon as unsuitable for astrophotography. Suess, however, sees these as opportunities for composite imaging. "For the darkest skies, I recommend shooting during the four to five days surrounding the new moon," he advises. "This ensures completely dark skies and the optimal view of the Milky Way. However, even on nights with a half or three-quarter moon, as long as the moon has not yet risen above the horizon, you can still capture astro shots. If moonrise is 45 minutes to an hour away, you have a substantial window of dark sky. Photograph your dark sky first, keeping your tripod and camera in the exact same position. Then, when the moon ascends, allow it to illuminate your foreground. Capture both images and composite them later in Photoshop."
He utilizes tools like PhotoPills to precisely determine the duration of blue hour, nautical twilight, and true astronomical darkness. "Astronomical darkness occurs when the sun is 18 degrees below the horizon, and there is no residual ambient illumination in the sky. This is when the Milky Way is most brilliantly displayed," he notes.
A simple yet critical pre-shoot check often overlooked by photographers involves adjusting camera display settings. Suess strongly recommends setting the Electronic Viewfinder (EVF) and LCD screen brightness to their lowest levels before venturing out. "There’s nothing worse than reviewing your shots on a bright viewfinder, only to find your night vision compromised," Suess observes. "It’s not just about preserving night vision; a high brightness setting can make your photograph appear significantly brighter than it actually is, leading to disappointment when you later view the RAW file on your computer. Always rely on the histogram for an accurate assessment of your exposure."
Leveraging Star Trackers: Patience and Precision for Deep Sky Imaging
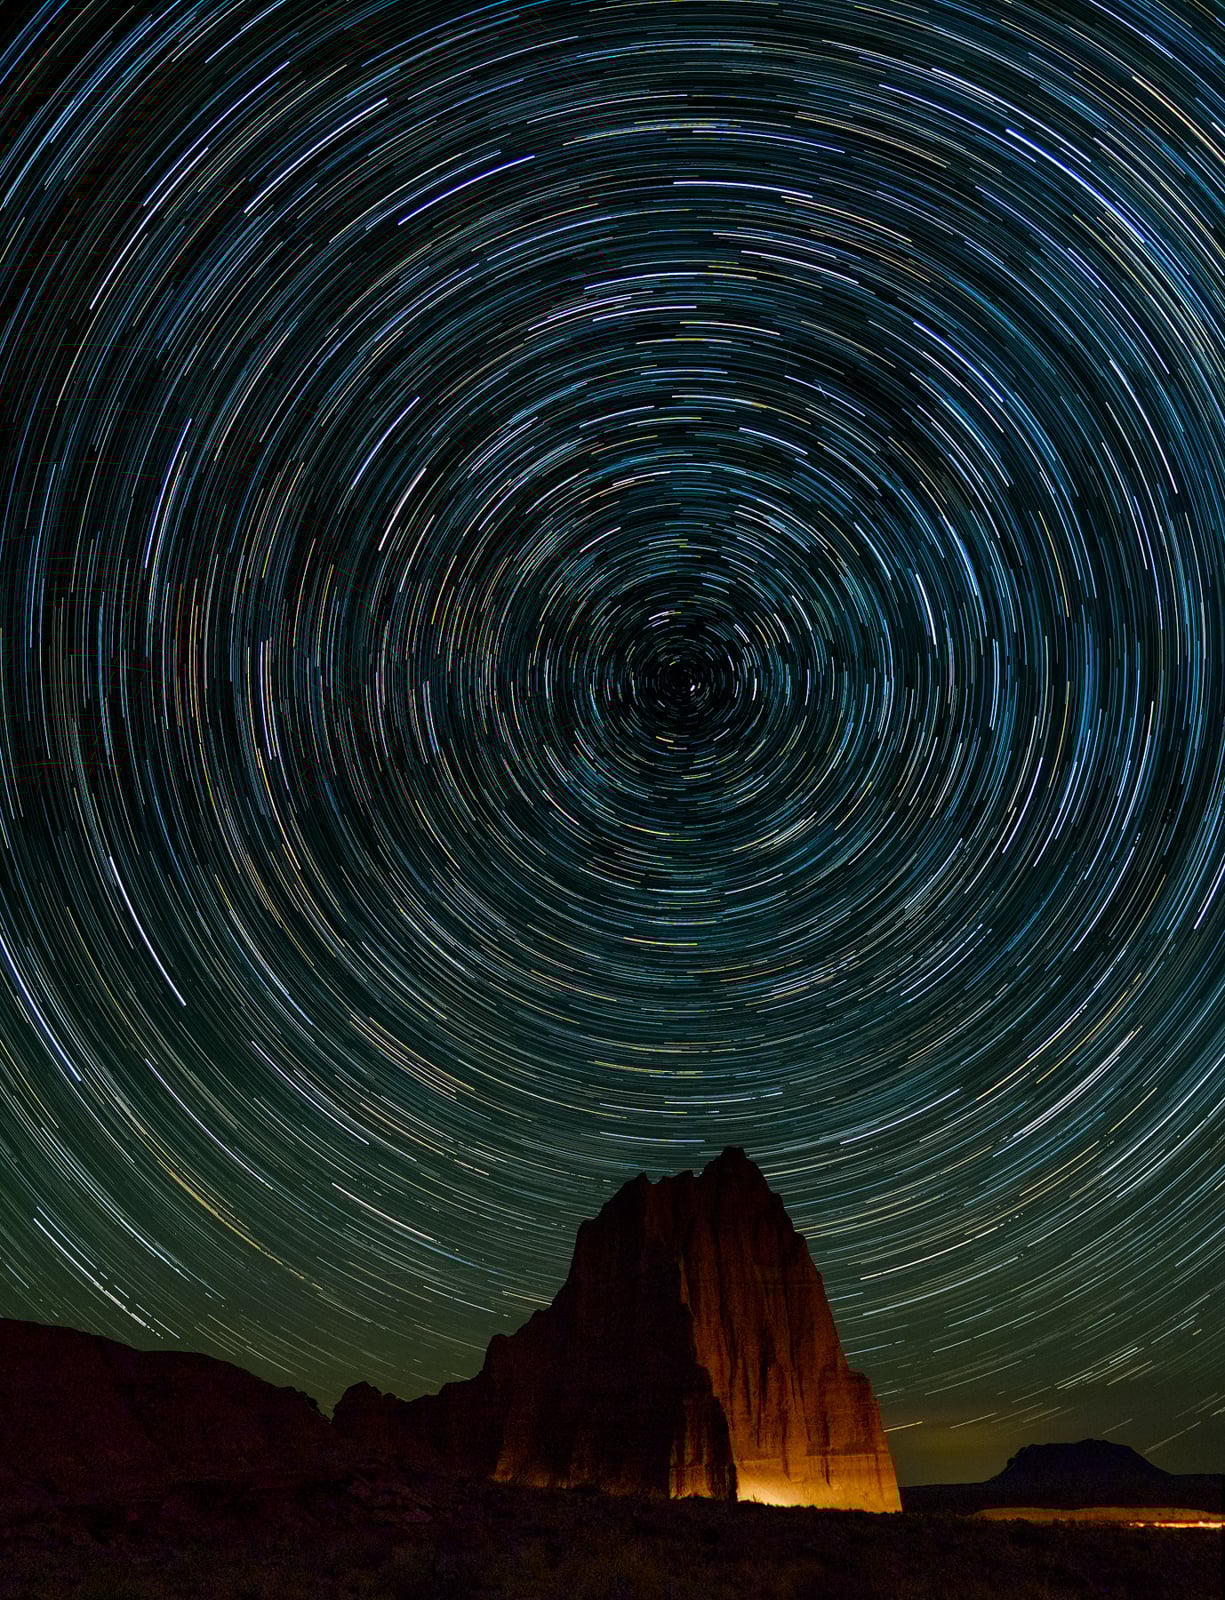
A star tracker is a motorized mount that synchronizes with the Earth’s rotation, effectively counteracting the apparent movement of stars across the sky. This allows for significantly longer exposure times, extending from 30 seconds to several minutes, thereby revealing colors and details imperceptible at shorter settings. This technology is particularly transformative for deep-sky astrophotography.
Weight is a critical factor that many beginners underestimate when selecting a tracker. "On a portable tracker like the Move Shoot Move NOMAD, the motor has a limited weight capacity," Suess warns. "Larger trackers with counterweights can comfortably handle heavier lenses because the counterweight balances the load on the motor. However, on systems without this capability, the lighter your camera and lens combination, the better the tracking performance will be. This is where the lightweight nature of the Micro Four Thirds system offers a practical advantage."
For his deep-sky endeavors, Suess pairs the Move Shoot Move NOMAD with the M.Zuiko Digital ED 50-200mm F2.8 IS PRO lens and the M.Zuiko Digital 1.4x Teleconverter MC-14. This combination maintains a manageable weight, allowing for stable long exposures.
Suess cautions that star trackers are primarily designed for deep-sky photography. While they can be used for wide-angle shots, an additional step is necessary. "When using a tracker, your foreground will inevitably become blurred because the tracker continuously moves to follow the stars," he explains. "If you intend to include foreground elements in your image, you will need to capture separate exposures for the sky and the ground, and then combine them in post-processing."
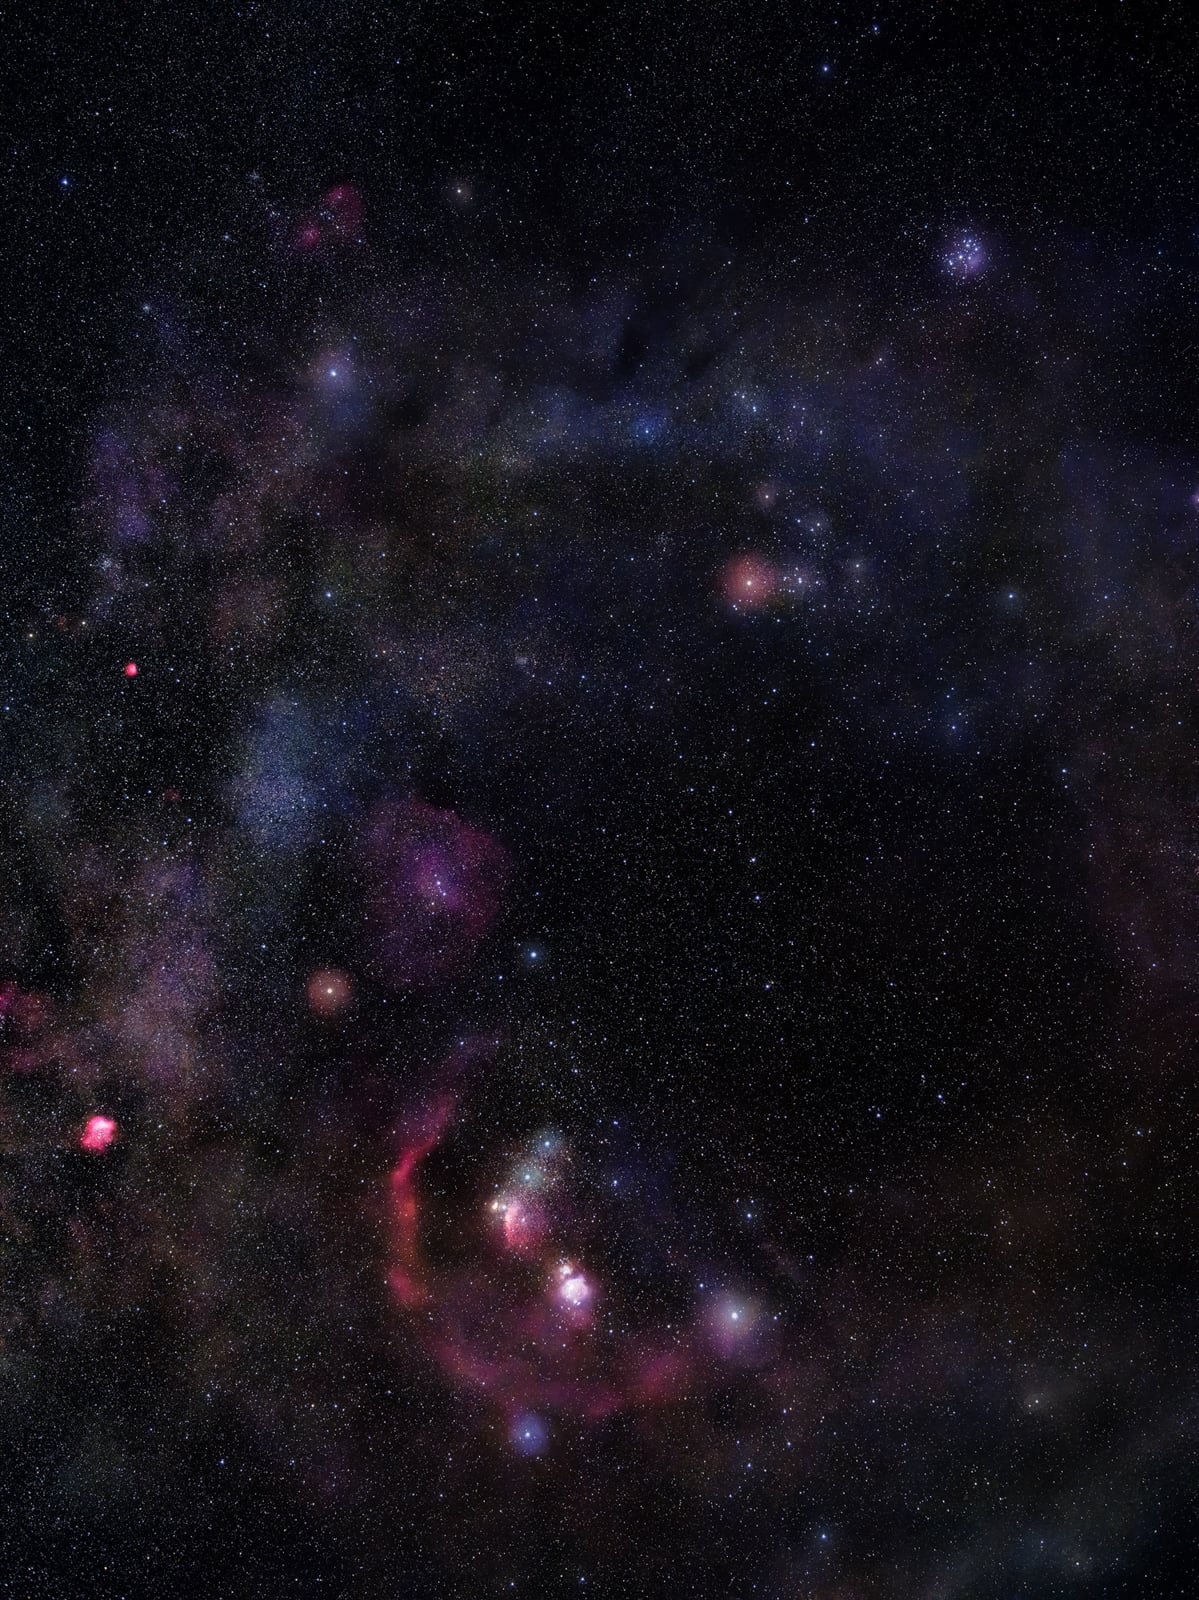
Despite his success in capturing deep-sky images, Suess acknowledges that mastering this genre is an ongoing process. "I am not an expert in deep-sky photography, and I’m uncertain if I ever will be," he admits. "However, I am thoroughly enjoying the learning curve and finding immense satisfaction in creating images distinct from my usual Milky Way shots. The moment I captured my first exposure of the Andromeda Galaxy, I was captivated. I was surprised by the level of detail achievable in a single exposure. The Orion Nebula, visible in winter, has also quickly become a personal favorite."
A common hurdle for beginners with their first star tracker is polar alignment—the precise orientation of the tracker’s axis towards Polaris, the North Star, enabling it to accurately follow celestial movements. "Achieving polar alignment begins with locating Polaris in the polar scope, and the initial challenge is that the view is inverted," he cautions. "Furthermore, obstructions like trees can pose a problem. Polaris maintains a fixed position, and if a tree obstructs your view, it creates a significant obstacle. Even when you believe you’ve achieved accurate alignment, you may still question if you’ve targeted the correct star, given the multitude of stars in the night sky."
Locating Polaris is one challenge; finding a faint galaxy at a telephoto focal length is another. "One of the primary advantages of a zoom telephoto lens, such as the 50-200mm, over a fixed telephoto is the ease with which you can locate your target," he explains. "You zoom out to a wider angle, take a quick test shot, and can then identify the position of Andromeda relative to surrounding stars. You then zoom in. With a fixed focal length lens, like a 300mm, you are essentially peering through a field of stars, trying to pinpoint a specific target. This is considerably more difficult."
Both achieving and maintaining alignment require distinct skills. "I cannot count the number of times I’ve achieved polar alignment only to accidentally nudge a tripod leg," he emphasizes. "Or you might get it perfectly dialed in, then attach a heavier lens, and one of your tripod legs sinks slightly into the ground. This requires immense patience and a degree of self-forgiveness, as things inevitably go wrong."
The Significance of Astro-Modified Sensors for Deep Sky Imaging
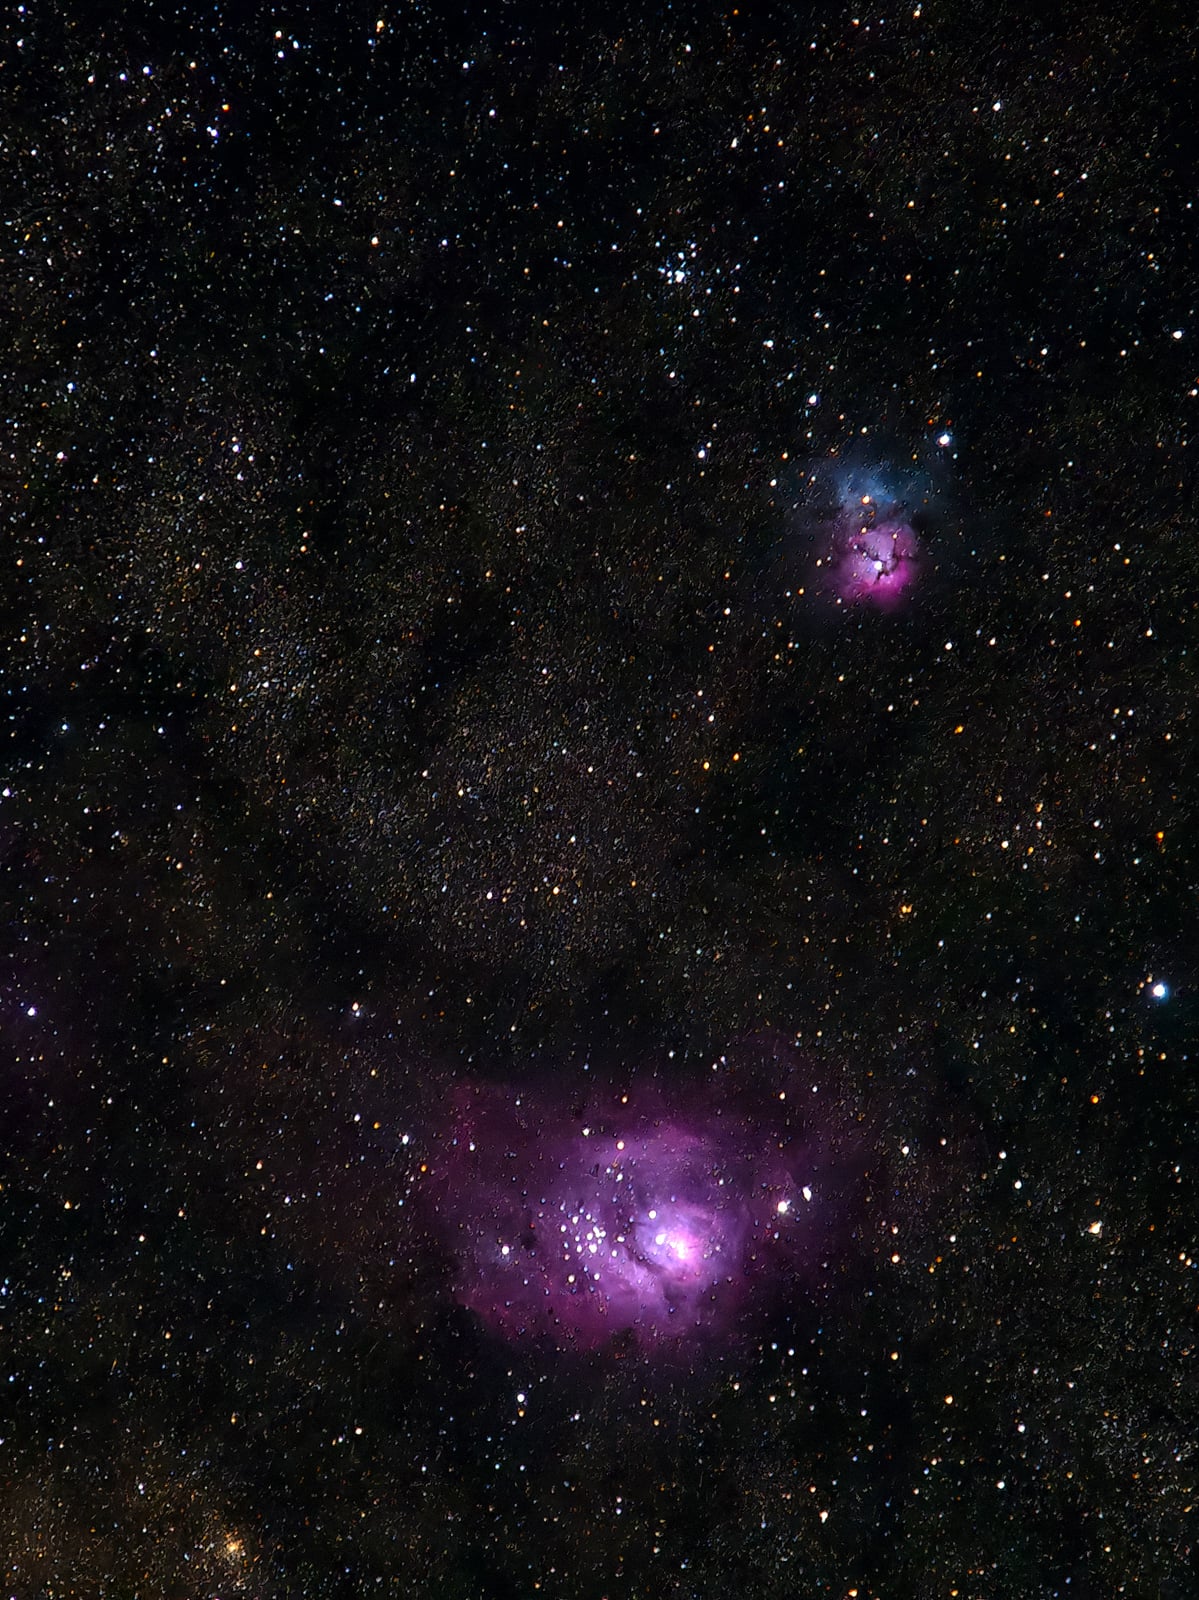
The OM-3 ASTRO marked Suess’s entry into the realm of deep-sky photography, and it revealed a critical detail often overlooked by photographers: standard camera sensors subtly filter out the very light emissions that define nebulae. On non-astro-modified cameras, the characteristic pink and red hues of the Orion Nebula appear as muted smudges. In contrast, an astro-modified camera captures this same scene with vibrant luminosity. This dramatic enhancement in color fidelity explains why professional nebula photographs often differ so significantly from what most consumer cameras can record.
Every standard camera sensor is equipped with a filter that blocks hydrogen-alpha wavelengths, the specific light responsible for the vibrant reds in nebulae. Traditionally, reintroducing this capability involved a third-party modification service, costing approximately $300, which often voided the camera’s warranty and resulted in a noticeable reddish-pink cast for any non-astro photographic use.
"An astro camera removes this filter, allowing it to capture a much greater proportion of that red light, potentially up to 80% more than a standard camera," Suess notes. "The difference in capturing subjects like the Orion Nebula is truly night and day."
The OM SYSTEM OM-3 ASTRO comes from the factory with a modified filter that fully transmits H-alpha light, fundamentally altering Suess’s approach to astrophotography. "This is my initial experience with an astro-modified camera, and I am still discovering its full capabilities," Suess reflects. "I recognize that I am only beginning to scratch the surface, but the journey has been fascinating. Even with a wide-angle lens pointed at the Milky Way, I am observing significantly more color. Certain nebulae embedded within the Milky Way, which a standard camera registers minimally, are now vividly captured. The effect is even more pronounced when using a telephoto lens."
On a star tracker, extended exposures provide the astro-modified sensor with ample time to gather hydrogen-alpha emissions, intensifying the reds in deep-sky subjects like the Orion Nebula. While the sensor modification addresses one aspect, artificial light pollution presents another challenge. "The body-mount filter system is something I have yet to thoroughly test, but the concept is exceptionally sound," he adds. "A light pollution filter, such as the BMF-LPC01, which is positioned behind the lens, ensures compatibility with any lens, including the M.Zuiko Digital ED 8mm F1.8 Fisheye PRO. Attempting to attach a screw-on filter to an 8mm fisheye lens is impractical."
The body-mount light pollution filter effectively diminishes the artificial light wavelengths emanating from urban areas, enabling fainter celestial details to be captured by the sensor without the color cast introduced by streetlights. "Once you have become proficient in photographing the Milky Way and find it an enjoyable pursuit, transitioning to a star tracker will elevate your images," he states. "Subsequently, adopting an astro-specific camera will represent another significant leap in quality. These advancements signify a true commitment to the craft."
The Undeniable Truth of the Histogram Over the Preview Screen
To ensure workable RAW files for post-processing, a fundamental rule must be observed: the histogram provides an accurate representation of exposure, while the camera’s preview screen can be misleading. The histogram, a small graph displayed on the back of the camera, illustrates the distribution of pixels across various brightness levels, from deep shadows on the left to bright highlights on the right. It is the sole reliable method for confirming, before leaving the field, whether an exposure contains sufficient detail or if significant noise reduction will be required during editing. Suess’s entire post-processing workflow is predicated on the information provided by the histogram.
"Many astrophotographers I consult with believe that accumulating more frames leads to a superior final image. However, I prefer to capture my astro shots in one or two exposures," Suess insists. "When you are only taking one or two frames, each one must be perfect, and the histogram is my primary tool for verification. With the advanced noise reduction software available today, I don’t find it necessary to stack multiple exposures for wide-angle Milky Way shots. Basic stacking software primarily serves to reduce noise, rather than adding meaningful detail to wide-field astro images. Deep-sky stacking, involving numerous exposures with calibration frames, is a different process that does indeed reveal more detail."
He has begun incorporating more specialized software into his workflow. "PixInsight presents a significant learning curve. I am just beginning to explore its capabilities. It facilitates stacking your photographs, includes plugins for star reduction to emphasize nebulae, and is the standard tool for serious deep-space photographers."
Each RAW processor interprets files differently, particularly during the demosaicing process, where sensor data is converted into color pixels. For the high-ISO files generated by his OM SYSTEM cameras at night, Suess relies on DxO PureRAW as his initial processing step. "The first time I compared a high-ISO file processed through PureRAW with one processed directly in Lightroom, the difference was striking," Suess recounts. "PureRAW preserved star detail while effectively reducing noise. Lightroom, in comparison, tended to smear the details. I have maintained this workflow ever since."

Suess explains that effective astro editing extends beyond mere noise reduction. "PureRAW is my preferred tool for noise reduction, but I also appreciate its demosaicing process and the subtle color enhancements it applies. Each RAW processing engine handles demosaicing uniquely, and I find PureRAW’s approach to color, noise, and lens sharpness particularly effective." His post-processing workflow typically follows a consistent sequence: "Once the file is cleaned, I import it into Photoshop, where I apply a high-pass filter for sharpening, a technique designed to enhance the intricate details within the Milky Way’s core. The final step involves DxO Nik Color Efex, where I utilize the Clearview and Tonal Contrast filters. These filters apply localized contrast sharpening to specific tonal ranges within the image, thereby adding clarity and visual impact."
Over-processing is a common error Suess observes in workshop participants’ edits. "I frequently see individuals attempting to extract data that simply isn’t present," he says. "They stack numerous weak exposures and try to force the processing, resulting in mottled-looking nebulae that lack realism. Begin with a strong single exposure, process it with excellent noise reduction, and allow the inherent data to speak for itself. This approach yields a more authentic and aesthetically pleasing result."
Preserving the Night Sky: A Call to Action
Nearly four decades prior to teaching workshops under the luminous Milky Way, Suess was a teenager in a Connecticut basement, aiming his camera at a sky obscured by light pollution. "I had a black and white darkroom when I was 12 years old, taking photos of trees and landscapes near my home," he recounts. "Back then in Connecticut, the sky was heavily light-polluted, and I never saw the Milky Way. But around my 16th birthday, I attempted to photograph the night sky to see what I could capture. In the prints, I noticed colors in the stars that were invisible to my naked eye—oranges and blues. Prior to that, I had assumed all stars were white. I was instantly captivated. I even pursued mechanical engineering with the ambition of designing rockets for NASA. That career path didn’t materialize, but my fascination with the night sky never waned."
This enduring sense of wonder continues to draw him outdoors, even when the comfort of staying warm indoors might seem more appealing. "One of my favorite activities is setting up two cameras: one capturing star trails using Live Composite and the other recording a time-lapse. Then, I simply sit back, gaze upwards, and watch for shooting stars. It fosters a profound realization of our minuscule place within the vastness of the universe."
What concerns him most is the diminishing accessibility of clear night skies for future generations. "The proliferation of satellites, increasing light pollution, and the impact of wildfires on atmospheric clarity are all significant concerns," he cautions. "It’s alarming to contemplate the state of the night sky in 10 or 15 years. We are currently in an exceptional era where anyone can venture out and experience this spectacle. However, this window of opportunity may not remain open indefinitely."
Suess was recently diagnosed with HPV-positive squamous cell oropharyngeal cancer. During his successful cancer treatment this past winter, OM SYSTEM provided him with one of the first OM-3 ASTRO cameras. Despite experiencing significant fatigue, he was compelled to venture outdoors on the rare clear nights. "When you are unable to go out and shoot, you begin to appreciate how much of what you love about this pursuit has little to do with the photographs themselves," he reflects. "It’s about being present in the quiet, cold air, gazing up at thousands of stars. Even if they are millions of light-years away, I can still reach them with my camera. I missed the act of exploring the Milky Way, the Andromeda Galaxy, and the Orion Nebula more than I missed the actual photographs I would capture. It has been months since I’ve been able to spend quality time behind the camera. I anticipate that looking up at the night sky again will be an experience I perceive differently than before."
Further insights from Matt Suess can be found on his website, Facebook, YouTube, and Instagram.
Image Credits: Matt Suess


